What to do after Upgrading GP and/or Migrating to a new SQL Server
Adjusting Dynamic Budgets after a GP upgrade is typically just a 5 minute task, see the steps below.
If you migrated GP to a new SQL server, please send us the name/instance of the new SQL server and we will issue you a replacement license file.
Steps to migrate Dynamic Budgets to an upgraded GP SQL Server
Part 1 - The first portion of the upgrade is typically performed by the Customer's IT staff (Database Administrator)
- Backup the DynamicBudgets database and Restore it into the new SQL server
- If you migrated the dynbud SQL user to the new server skip to Part 2, otherwise perform steps 3,4,&5
- Delete and recreate the SQL
user login “dynbud” from each of the following databases
- DynamicBudgets
- Dynamics
- Each
GP Company
- Grant Security for the dynbud SQL user with the following User Mapping
- DynamicBudgets (db_owner)
- Dynamics (db_datareader)
- Each GP Company (db_datareader)
- For each Dynamics GP company database run the following statement to enable the dynbud user with security rights to export budget details back to GP:
Grant Insert, update, delete, select, references on GL00201 to [dynbud]
Part 2 - The following portion of the upgrade is typically performed by DynamicBudgets support staff
- Replace the license.licx file in the DynamicBudgets-App folder with a new license for the new named SQL server
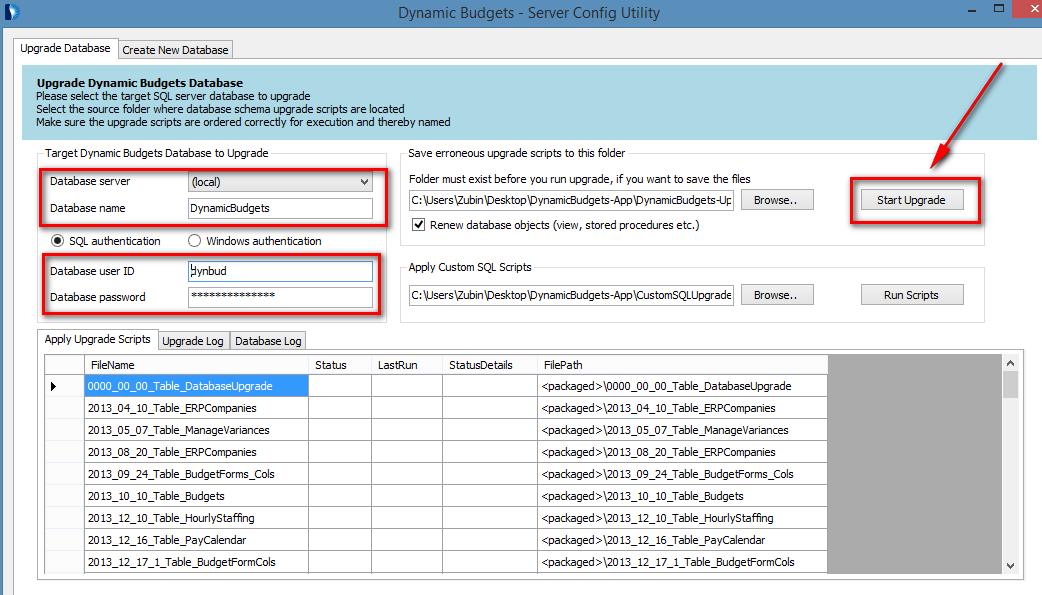
- Launch the Server
configuration Utility, run the upgrade process (verify that you are pointed to
the new server)

- Next you will need to reveal the lower half of the login screen to be able to change the server reference.
Using notepad, Open the Client settings file found in
(DynamicBudgets-App\DynamicBudgets.Windows.Client.exe.config.xml)
Change the HideDBConnectionOnLogin value from 1 to 0, and save.
- Login to the application and
change the designated server to the new server in the Database Connections drop
down menu.

- Go back to (DynamicBudgets-App\DynamicBudgets.Windows.Client.exe.config.xml)
Change the HideDBConnectionOnLogin value from 0, back to 1, and save.
- Login to Dynamic Budgets, Open System Management \
Manage Servers
manually update the name of the server,
(which can be found in the application header)
Click Test Connection
If successful, click save.
- Test by going to Reports \ Monthly Summary Accounts and try to drill down to transaction details for the live month.
- End